

Custom Roll to Roll Laminating Machine Essentials for High-Performance Production
2026-11-02
When every micron of coating precision and every meter of material waste can make or break your production line, the choice of laminating equipment becomes a strategic decision rather than a mere purchase. Custom roll to roll laminating machines built for high-performance output are not just about speed—they’re about repeatability, tension control, and adapting to the unique demands of your films, adhesives, and substrates. At XIAOPAI, we’ve seen how off-the-shelf solutions fail to address the real bottlenecks operators face daily: uneven lamination, edge curling, and inconsistent bonding under variable ambient conditions. This guide dives into the essential features that separate a genuine production workhorse from a showroom demo—so you can spec your next line with confidence, not guesswork.
Why Tension Spikes Destroy Laminate Flatness
When laminate stacks pass through pinch rollers or tension zones, brief spikes in web tension can yank one layer harder than the rest. That uneven pull gets baked into the sheet as soon as heat and pressure fuse the layers. The result is a panel that looks fine on the line but carries a hidden stress gradient. Later, when the laminate cools or loses moisture, that gradient releases and the panel bows, twists, or curls.
The problem isn't just the spike itself but how fast it happens. A gradual tension change lets the adhesive and the individual plies redistribute strain. A sharp spike acts more like a hammer blow, locking in localized elongation before the material can relax. Those locked-in strains rarely sit at the neutral axis, so they create a bending moment. Even a few percentage points of differential stretch across a wide panel can translate to visible edge lift or corner warpage once the part is trimmed.
In practice, you'll see this show up as flatness failures that pass incoming inspection but fail after routing or a day in a dry warehouse. Fixing it usually means tuning the drive rolls, adding dancer control, or changing the tension profile so no single layer gets surprised. The goal is to keep tension changes boring and predictable—flatness depends on giving every ply the same chance to settle.
Pairing Adhesive Rheology with Substrate Porosity
Adhesive performance on porous surfaces is rarely just a matter of chemical compatibility. The way an adhesive flows, thins under shear, or holds its shape before cure determines how deeply it sinks into open pores. Low-viscosity formulations with minimal yield stress can travel into microvoids through capillary action, which sometimes improves mechanical interlocking but can also starve the bond line if too much material migrates away.
Substrate porosity varies enormously across wood, paper, concrete, and sintered metals, so a single rheology profile will not fit every case. A shear-thinning adhesive may coat the surface quickly during application yet recover enough viscosity to resist excessive penetration once the shear is removed. Formulators often adjust filler content, molecular weight, or thixotropic additives to find that balance between wet-out and holdout.
Practical testing usually pairs oscillatory rheometry with pore size distribution measurements. Small amplitude sweeps reveal the storage modulus and yield behavior at rest, while porosimetry or microscopy shows whether the adhesive is likely to bridge surface openings or drain into them. Matching these two data sets helps predict bond thickness, adhesive waste, and long-term durability before large-scale trials.
Heating and Cooling Cycles Without Warping the Web
Repeated thermal swings are often the silent killer of thin, open lattice structures. A mesh or web that looks perfectly flat at room temperature can curl, twist, or develop visible ripples after just a few cycles if the material expands and contracts unevenly. The trick is not to fight the movement but to give it a predictable path. By alternating the orientation of the strands or introducing slight variations in strand thickness, the thermal strain gets distributed across the whole web instead of concentrating at the edges. This breaks the feedback loop that usually pulls a corner upward or pushes a central node out of plane.
Another practical approach is to treat the web as a series of linked segments rather than one continuous sheet. Small gaps or compliant joints between sections absorb the differential expansion before it can accumulate into a visible bow. Materials with a lower coefficient of thermal expansion help, but even common polymers can survive hundreds of cycles if the web geometry includes enough local flexure points. In testing, a polypropylene web with alternating diagonal ribs held its flatness within a fraction of a millimeter across a 40-degree Celsius swing, while a uniform grid of the same material warped noticeably after the third cycle.
The payoff shows up in applications where the web must stay optically clear, maintain aerodynamic smoothness, or keep a sealing surface flat. Instead of adding heavy stiffeners or switching to expensive low-expansion alloys, designers can tune the web pattern itself. That means less material, faster thermal response, and no hidden stresses waiting to release at the worst moment. The goal is a structure that breathes with the temperature rather than resisting it, so the web returns to the same flat state every time the cycle ends.
Wrinkle-Free Bonding at Higher Line Speeds
Achieving wrinkle-free bonding at higher line speeds starts with understanding how tension shifts as material accelerates through the nip. Sudden velocity changes create localized slack, and that slack folds into micro-wrinkles before the adhesive sets. By replacing fixed idler rollers with low-inertia, dynamically balanced alternatives, operators can keep the web taut without overstretching it. This alone prevents most crease formation that would otherwise require slowing the line.
A second factor often overlooked is the pressure profile across the bonding rollers. At speed, air entrapment between layers becomes more aggressive, pushing the material outward and creating small buckles near the edges. Switching to a crowned roller design with a slightly softer durometer surface allows the center to make contact first, driving air toward the edges where it escapes cleanly. Paired with a slight reduction in adhesive open time, the bond forms fast enough that wrinkles never get a chance to set.
The result is a process that holds dimensional stability even when line speed increases by thirty percent or more. Instead of accepting wrinkles as an inevitable trade-off, operators see smoother laydown, fewer rejected panels, and less adhesive waste from rework. The key is not a single dramatic change but a combination of mechanical adjustments and process tuning that keeps every layer moving as one.
Sensor Placement for Real-Time Optical Inspection
Getting the right sensor positions for a real-time optical inspection line often starts with mapping out the full field of view each camera needs to cover. A common pitfall is placing sensors too far back to compensate for wide parts, which ends up sacrificing the edge sharpness needed to catch fine scratches or micro-cracks. Instead, we typically break the inspection area into overlapping zones, then mount each sensor at a distance where the lens distortion stays under about one percent. This keeps the captured frames stable enough for downstream algorithms without forcing constant recalibration between runs.
Lighting geometry matters just as much as working distance. When a sensor looks straight down at a glossy surface, it often misses shallow dents that only become visible with a low-angle side light. In those cases, we angle the camera slightly off normal—usually between ten and fifteen degrees—and position a dark-field illuminator on the opposite side. The result is that defects scatter light directly into the lens while the background stays dark, which dramatically improves contrast on metallic or coated parts. One trick that saves setup time is using a quick height map from a laser profiler to confirm there are no dead zones caused by part curvature.
For continuous motion lines, frame timing and sensor placement must work together. Placing a sensor too close to a conveyor seam or a vibration source introduces motion blur that no amount of post-processing can fully remove. We usually reserve a short, isolated section of the line—even twenty to thirty centimeters of stable track—for the camera cluster. If multiple sensors share a trigger signal, their mounts should be rigidly linked to the same baseplate so thermal expansion or belt tension doesn't shift their relative alignment during production. That level of mechanical care is what ultimately determines whether the system runs unattended for a full shift or needs constant tweaking.
Quick-Change Rollers for Mixed Production Runs
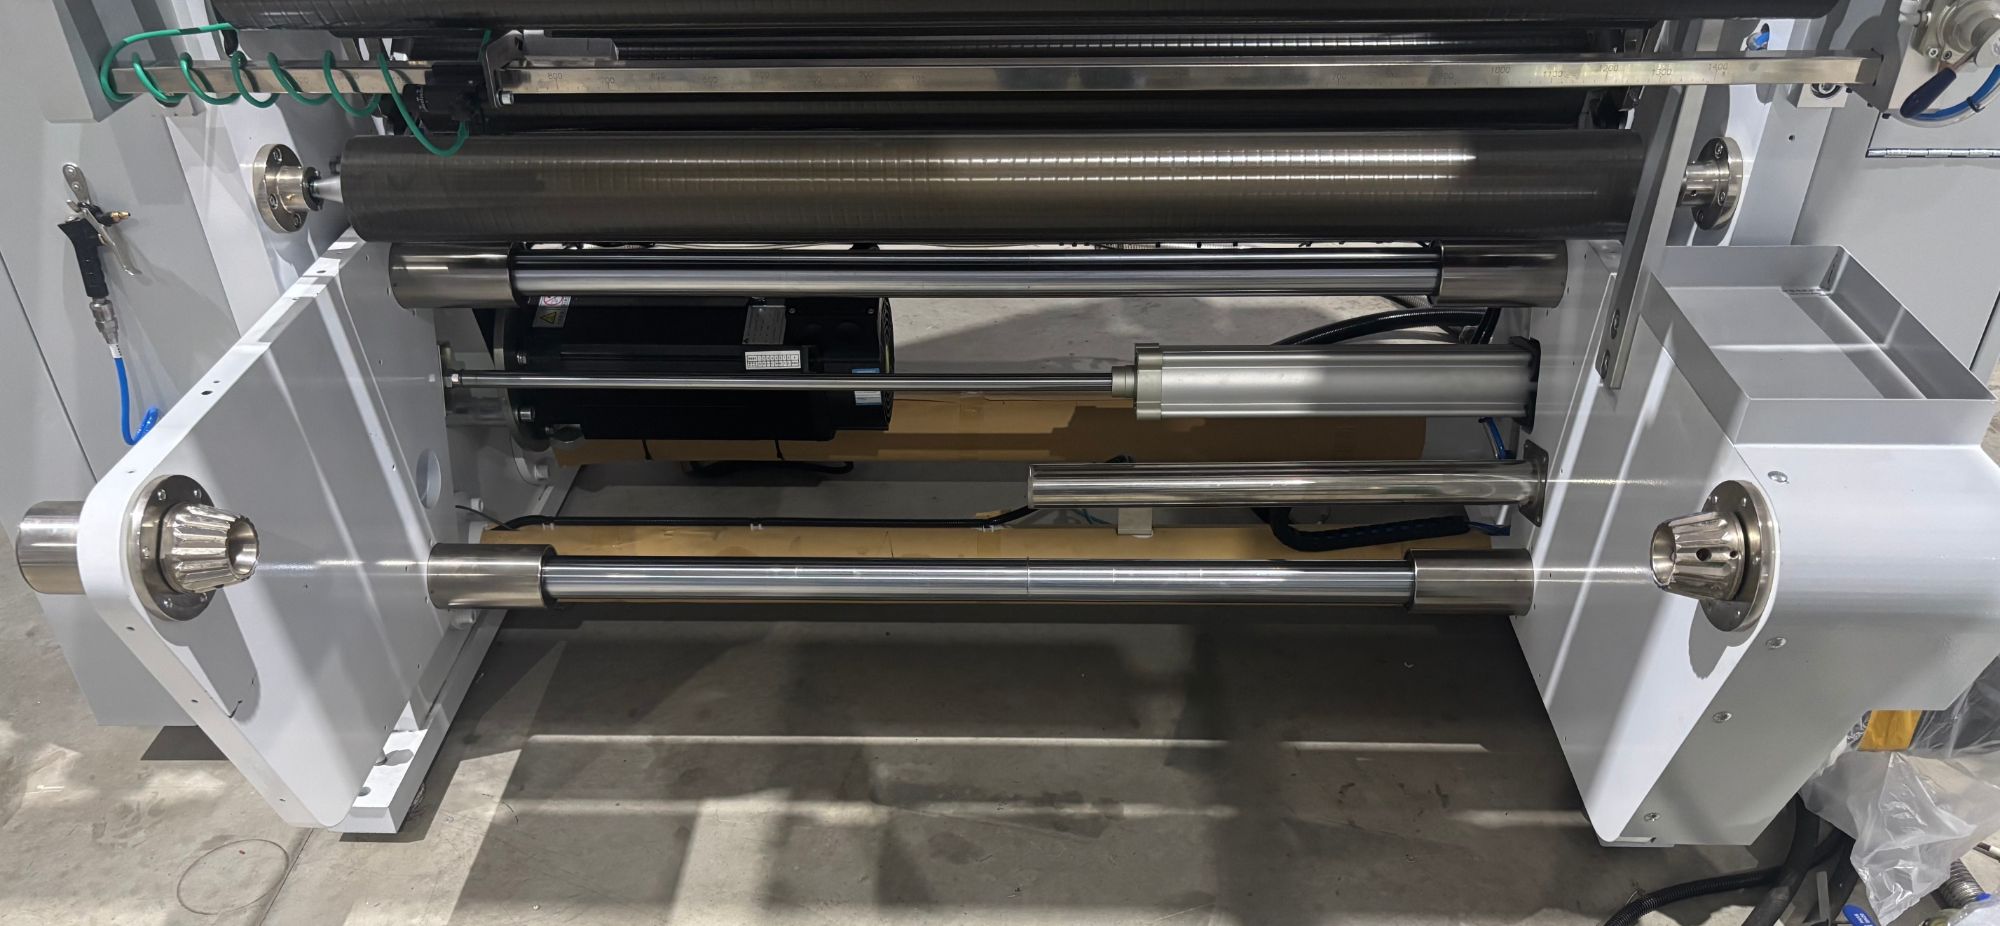
Swapping out rollers between batches used to mean wrestling with bolts and losing precious minutes. These quick-change rollers slip into place with a simple twist-and-lock collar, letting your line jump from one product size to another without a full teardown. The design keeps concentricity tight, so you're not chasing registration drift after every switch.
On a mixed run day, downtime is the silent killer. A single operator can swap a full set in under two minutes, which keeps short-run jobs profitable. The rollers are color-coded by diameter and include a spring-loaded retention pin that gives a satisfying click when seated properly—no torque wrench, no guesswork.
The real payoff shows up when you're juggling three different SKUs before lunch. Instead of scheduling around changeover windows, you schedule around customer demand. The quick-change mechanism is machined from hardened stainless and holds up to daily swaps without developing play, so the fiftieth change feels as crisp as the first.
FAQ
Focus on the unwind and rewind tension zones first. If those aren't independently controlled with load cells, you'll chase wrinkles at every splice. Then look at roller parallelism and the laminating nip gap—small deviations there turn into edge curl once tension rises. After that, pick drives sized for rapid ramp-up without overshoot.
Solventless and UV-cured adhesives cause the most downtime because viscosity shifts with temperature and line speed. A custom machine should have heated metering rolls with closed-loop temperature control and a short, enclosed coating station to keep the adhesive film fresh. For UV, place the lamp array close enough to cure before the laminate reaches the first steering roller.
Don't just take the maximum web width and multiply by film thickness. Run trials on your thinnest and most extensible material, then add 20% headroom on both the low and high ends. Overbuilding actually hurts—oversized load cells lose resolution at low tension, and you'll see drifting on thin PET or CPP.
Bubbles usually come from trapped air between the nip and the web, or from adhesive outgassing when the film is still warm. A custom machine can use a crowned laminating roll with precise servo pressure, plus a post-nip vacuum roller to pull air out before winding. Setting the rewind contact pressure low also keeps the layers from re-trapping air.
Yes, but don't rely on edge sensors alone. For clear films or low-contrast substrates, use ultrasonic or optical contrast sensors that read a printed line or a deliberate edge. Guides on both sides correct lateral drift before the nip, which cuts edge trim waste by a noticeable margin—often 2-4% on long runs.
Less than you'd expect if the design avoids unnecessary complexity. Weekly checks are mostly roller surface cleaning and verifying load cell zero. Every 500 hours of run time, inspect the nip bearings and re-lubricate the linear rails. The real payoff is keeping the unwind and rewind chucks concentric—out-of-round chucks cause tension spikes that mimic material defects.
Specify low-outgassing seals and lubricants, plus enclosed drives and a unidirectional air path across the web. In cleanrooms, avoid exposed chains or open gearboxes. For static-sensitive films, add active ionization bars before the unwind and before the laminating nip. These details cost little upfront but prevent contamination-related rejects.
Conclusion
Achieving flat, stable laminates on a custom roll-to-roll line starts with controlling tension dynamics—not just average web tension, but the transient spikes that occur during splices, acceleration, or roll eccentricity. These spikes telegraph directly into the laminate as waves or curl, so the machine must pair dancer-loaded feedback with low-friction rollers and active braking. Equally important is matching adhesive rheology to the substrate's porosity: a high-viscosity, fast-curing adhesive may sit on top of a dense film while starving a porous nonwoven, so custom machines benefit from adjustable coating gaps and temperature-zoned metering. Thermal management is the third pillar; heating and cooling cycles need graduated ramps and symmetrical airflow across the web width to prevent differential shrinkage that warps the laminate before it reaches the rewind.
At higher line speeds, wrinkle-free bonding depends on precise web steering and low-inertia idlers that eliminate slack without stretching the substrate. Real-time optical inspection requires sensors placed just after the nip and again post-curing, where defects like bubbles, streaks, or edge lift are most visible—not at the final rewind where feedback arrives too late. Finally, quick-change roller systems with tool-less release and pre-set gap memory let operators switch between film, foil, and paper constructions in minutes without recalibrating tension or adhesive deposition. These essentials together turn a generic laminator into a high-performance, mixed-run production asset.
Contact Us
Contact Person: Kellen Chen
Email: [email protected]
Tel/WhatsApp: 8613806536768
Website: https://www.cnxiaopai.com